Baking Local Produce to Perfection – Simple Blackberry Cobbler

I love the concept of farmers markets–buying local, sustainably grown food, without harmful pesticides–however, I find the markets stressful. I’m partial to the calm aisles of the grocery store where I can compare prices without collecting stares. I want the best price I can find, not a forced conversation. It’s purely personal preference. I do venture to my local farmer’s market to buy local honey and some nitro cold brew coffee, delicious treats which deserve posts of their own.

I have become more interested in buying local produce (wherever you please) based on what is in season. I’ve found a few websites that help me figure out what’s growing near me. I encourage you to do the same! Here in Texas, pumpkins and apples grow in the Fall, and blackberries and blueberries grow in the summer. What follows is the first of five fall and summer recipes that taste best with fresh, local produce.

#1: Simple Blackberry Cobbler

When I was a kid, my family lived about a mile from my middle school and I would walk there during the year. In the summer, we went there to pick from the blackberry bushes behind the buildings. I didn’t know then how lucky we were to be able to pick local berries without paying. We each filled up a bucket and we went home to wash the berries, set some aside to top cereal, and then baked a cobbler.

I discovered the recipe below during my first summer on the hot and humid east coast. I had a new boyfriend, and I was getting to know his likes and dislikes. I learned quickly that he loved all desserts blueberry, hated apples, and disliked pumpkin. Yes, I was shocked by his feelings toward apples, and downright disappointed by his feelings toward pumpkin, but I was determined to impress him. I looked for a recipe without expensive or odd ingredients. This recipe did the trick, and works with blueberries as well as blackberries. My boyfriend loved it and still asks for it now that we’re married. It tastes best topped with vanilla ice cream.

Yield: 6-9 servings

INGREDIENTS

  • 4 cups fresh blackberries (or blueberries)
  • 1 tablespoon freshly squeezed lemon juice 
  • 1 large egg
  • 1 cup sugar
  • 1 cup all-purpose flour
  • 6 tablespoons butter, melted

DIRECTIONS

  1. Preheat oven to 375°.
  2. Place blackberries (or blueberries) in a lightly greased 8-inch square baking dish and sprinkle with lemon juice.
  3. Stir together egg, sugar, flour, and vanilla with a fork until mixture resembles coarse meal. Sprinkle over fruit.
  4. Drizzle melted butter over topping. Don’t worry, it won’t cover every inch.
  5. Bake at 375° for 35 minutes or until lightly browned and bubbly. Let stand 10 minutes, and serve warm.

NOTES

To make serving simple and impress guests, bake for the same amount of time in 6 (8-oz.) ramekins on an aluminum foil-lined baking sheet.

Adapted from Southern Living.


5 Flourless Chocolate Desserts – Peanut Butter Cups

#5: Dark Chocolate Peanut Butter Cups

It’s the day after the fourth of July, and spending the day at my in-laws blissfully quiet home in the Blue Ridge Mountains I had some time on my hands. I also needed a final post for this series, which I had to give the number five, because I always alliterate if possible. And thus, I found a mouthwatering recipe for dark chocolate peanut butter cups, and made it my own. My sister-in-law April subsists on about five foods, including Reese’s Peanut Butter Cups. She told me, “After someone has one of these, they won’t want a Reese’s ever again.” That’s high praise.

YIELD: 12 (mini muffin sized servings) or 6 (regular muffin sized servings)

INGREDIENTS

  • Coconut Oil and Honey Fudge
      • ½ cup coconut oil
      • ¼ cup honey (or maple syrup)
      • ½ cup unsweetened cocoa powder
      • ¼ teaspoon vanilla extract
      • ⅛ teaspoon salt
  • 1/2 cup peanut butter (or almond butter)
  • 3 Tbsp. honey (or to taste)
  • 1/2 tsp. vanilla extract
  • 1/4 tsp. fine grain salt

DIRECTIONS

  1. Mix the peanut butter, honey, vanilla extract and salt in a small bowl. Set aside.
  2. Mix the ingredients for Coconut Oil and Honey Fudge in a saucepan on low until smooth. Make sure the honey is well incorporated.
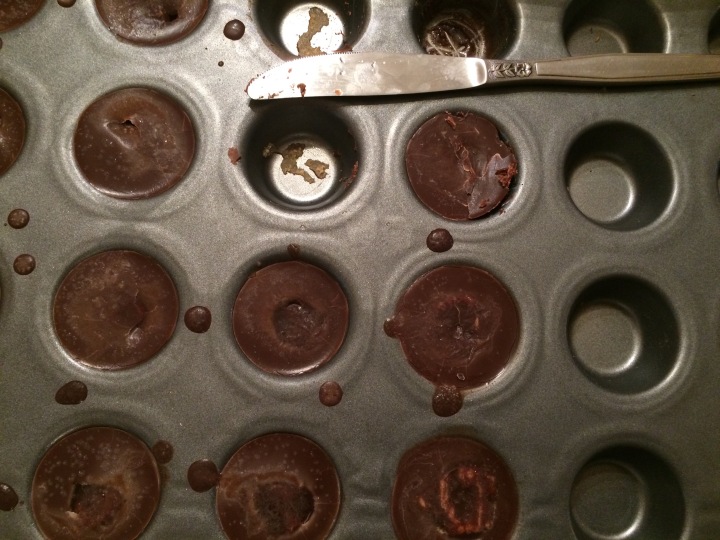
  3. Spoon the fudge into your muffin tin. Leave a few centimeters of space in each, so they don’t overflow when you plop in the peanut butter mixture. Keep about 1/4 cup left in the saucepan.
  4. Spoon the peanut butter mixture into the muffin tin (one teaspoon per muffin slot).
  5. Press the gobs of peanut butter mixture down to cover them with the fudge, and  pour the remaining fudge over to cover the gobs as needed.
  6. Refrigerate them for an hour or freeze for 30 minutes to allow them to set. Use a knife on the edge of each cup to lift them out. They will melt after a while at room temperature.

 NOTES

  • You can forego making the fudge and instead use dark or semi-sweet chocolate chips (1 and 1/3 cup) or two 4 ounce bars. This option makes the peanut butter cups stable at room temperature, because it leaves out coconut oil.
  • If you would like a dry, dense center like those in store-bought peanut butter cups, add 1 Tbsp. powdered sugar to the peanut butter mixture.
  • For garnish, sprinkle the tops with sea salt. This works best when they are slightly cooled.

Adapted from Sprouted Kitchen.

IMG_2434

IMG_2395

IMG_2422

IMG_2424

IMG_2428


IMG_2438

5 Flourless Chocolate Desserts – Fudge

#4: Coconut Oil and Honey Fudge

One of my college housemates, Grace, studied dietetics. Sometimes she would bring home treats she made in class, and she invited me and my fellow housemates to events hosted by the campus Nutrition Club. It was at one of these events that I went to my first farmer’s market. Grace is a gem, and after completing graduate school she’s now a dietician!

This recipe was inspired by one of the treats she brought home. The class assignment was to make a dairy-free chocolate, suitable for people with lactose intolerance. She used two recipes, one using honey as the sweetener, and the other using pure maple syrup, the latter being suitable for vegans as well. The maple syrup flavor is less noticeable, but I use honey because it’s more affordable. Grace’s recipe didn’t have vanilla or salt, but I’ve found these additions to greatly improve the flavor.

Yield: 9 servings

INGREDIENTS

  • ½ cup coconut oil
  • ¼ cup honey (or maple syrup)
  • ½ cup unsweetened cocoa powder
  • ¼ teaspoon vanilla extract
  • ⅛ teaspoon salt

INSTRUCTIONS

  1. Add all ingredients to a small saucepan.
  2. Heat on low while you whisk the mixture until smooth (make sure the honey is well incorporated).
  3. Pour into a small plastic or glass food storage container (I use a 4×4 inch tupperware).
  4. Stick in the freezer for 30 minutes or refrigerator for 60 minutes to solidify before cutting into 9 pieces to eat.

NOTES

  • You can alternatively microwave the mixture, in 10 second increments, whisking in between until it’s smooth.
  • Keep it stored in the fridge or freezer. It will melt after a while at room temperature because of the coconut oil.
  • I recommend doubling the recipe, because you will definitely want more!

Adapted from Back to Her Roots.

5 Flourless Chocolate Desserts – Mousse

#3: Dark Chocolate Mousse

Baking is a great way to say hello–to new neighbors, teammates, in-laws, and friends–as well as the perfect way to lighten a goodbye. In the case of this chocolate mousse, I made it as my apartment was piled high with boxes and my perishables waited to be thrown out, to say goodbye to my life in Delaware. I gave the mousse to my co workers on my last day, in plastic wine glasses and cupcake liners! I know, cookies would have been more clean-cut, but I had quite a lot of eggs, and was determined to try a new, fancy dessert. Considering all the packing I had yet to do, it was silly, but as you will find, the mousse is more than worth the effort. And it was truly an effort because I didn’t have a mixer and had to beat the egg whites (8, because I doubled the recipe) by hand until they formed stiff peaks. 


YIELD: 4-5 ramekins

INGREDIENTS

  • 200g of dark (recommended) or semisweet chocolate (1 cup if you use chocolate chips, or about 7 ounces of a chocolate bar)
  • 3 tbsp of freshly made espresso/strong black coffee (or more/less to taste)
  • 4 room temperature eggs
  • 1-2 tbsp powdered sugar, depending on how sweet the chocolate is

DIRECTIONS

  1. Break the chocolate into pieces and put it in a double boiler with water below (or a large bowl suspended over pan of water). Heat the water to melt the chocolate– direct heat will burn it.
  2. Once the chocolate is starting to melt, stir in the coffee.
  3. Keep stirring the chocolate and coffee until all the chocolate has completely melted and the coffee is well incorporated. It needs to be as smooth as possible so keep stirring to make sure no small lumps are left.
  4. Remove the bowl (or double boiler) from the pan and turn off the heat. Leave the chocolate goodness on the side to cool for a moment.
  5. Meanwhile, separate the yolks & whites of the eggs into two different bowls– both should be a decent size to minimize splatter when whisking!
  6. Add the sugar to the egg yolks and whisk thoroughly until they’re lovely and bubbly. Fold the beaten egg mixture into the now slightly cooled but still warm chocolate goodness, taking care to incorporate it but not over-stir it.
  7. Beat the egg whites until they’re stiff and peaky, then immediately fold them into the chocolate goodness too. The over-stirring issue is even more important here so lift and fold rather than stirring around.
  8. Once the egg whites are thoroughly folded in and the whole thing is a lovely consistent brown, pour it into ramekins or mugs.  Refrigerate for a couple of hours before eating.

NOTES

The mousse could easily be dressed up with some raspberries/ blueberries (or an oreo!) and a dusting of cocoa powder.

Adapted from The Really Good Life.


5 Flourless Chocolate Desserts – Brownies

#2: Flourless Brownies

I discovered this brownie recipe while living in the first apartment of my own, outside of Philadelphia. I moved to the area from Washington state to start my first job out of college. When I made the big (and scary) move, I had first arranged to live with a family until I got my feet on the ground. The couple had a big house and five children. When I moved in, I told them of my love for baking and my plan to bake goodies for them. I never touched the oven, and it was because another love entered my life, quite unexpectedly.

Three months in, I started dating my now-husband, and then moved into an apartment much closer to his place. In this new (to me) apartment, I really began cooking and baking. That’s what a man will do to a woman who is falling for him! My favorite time to bake was when he and I would host friends for dinner at my apartment. It was one of those times when I made these flourless brownies. I found them to be better than any brownies I’ve ever made, so I made them again and again for friends who came to dinner. The key is that the recipe calls for real chocolate(think dark chocolate bar) as well as cocoa powder. They are very chocolaty and taste amazing served with vanilla ice cream.

Yield: 16 brownies

INGREDIENTS

  • 6 tbsp. salted butter
  • ¾ c. granulated sugar
  • 8 oz. semisweet or dark chocolate, chopped*
  • 2 eggs, room temperature**
  • 1 tsp. vanilla extract
  • 1 tbsp. unsweetened cocoa powder
  • 3 tbsp. cornstarch
  • ¼ tsp. salt

DIRECTIONS

  1. Preheat oven to 350 degrees.
  2. In a small saucepan set over low heat, melt the butter, then add the sugar. Once the sugar is incorporated, add the chopped chocolate, stirring until smooth. Remove from the heat beat for 2 minutes with a hand mixer or whisk. Add the eggs, one at a time, then the vanilla extract.Using a mesh sieve (or a sifter, or just pour/shake slowly), sift the cocoa powder and cornstarch into the saucepan, then add the salt. Stir together, then beat the batter vigorously for 1-2 minutes. Use a hand mixer on a medium speed, or just get a great arm workout. Beat until the batter is smooth and shiny.
  3. Pour the batter into the prepared pan and bake for 22-30 minutes or until the brownies are set in the center. I don’t recommend underbaking them, because they’re already very rich. Remove from oven and let cool in the pan for 45 minutes before removing and slicing.

NOTES

*You can use 2 semisweet or dark baking bars that are 4 oz. each, but 1 ⅓ cup chocolate chips works too.

**If you use cold eggs, it will be more difficult to get the mixture smooth at step 2.

Adapted from Life Made Simple.

5 Flourless Chocolate Desserts – Pudding Cakes

# 1: Lisa’s Warm Chocolate Pudding Cakes

During my time at college in rainy Seattle, Washington, I had the pleasure of living with seven other girls in a small, three bedroom house. Some of my fondest college memories were made there, in the tucked away, yellow house we called the Bungalow. My dear red-headed friend Lisa wowed us all when she made this pudding cakes recipe for the house. After that, I repeatedly asked for it (or made it myself) on my birthday.  I owe this recipe to Lisa, one of the first women I knew to own her love for all things domestic. She is also an avid outdoors-woman! Below is the recipe exactly as she wrote it. My only note is that if you don’t have ramekins, we often used mugs and found they leave you with a more gooey or molten center. Enjoy!


INGREDIENTS

  • 1/2 cup and 1T Butter
  • 1/2 cup and 3T semi-sweet chocolate chips

Dry:

  • 3/4 cup powdered sugar
  • 1 1/2 T cocoa powder
  • 2T corn starch
  • 6T finely ground almonds
  • 1/4 t salt

Wet:

  • 3 whole eggs
  • 3 egg yolks
  • 1/2 t vanilla

DIRECTIONS

  1. Melt butter and chocolate in a double boiler
  2. While chocolate is melting, combine the dry ingredients in a bowl.
  3. In a separate bowl whisk the eggs, egg yolks and vanilla
  4. Combine the chocolate/butter and dry ingredients, mixing well
  5. Lastly, mix in the eggs and vanilla
  6. Spoon into dishes/ramekins 3/4 of the way full.
  7. Bake at 350 for 20 minutes in a WATER BATH

Hint!: check the cakes at 15 minutes. You do not want them to over bake because they are supposed to be molten on the inside!

Eat. Yum.